Visual Studio Code is an open-source, cross-platform text editor. Scala is supported via an official plugin. This is a short guide for installing and using Visual Studio Code (VS Code) for developing one’s programming assignments in the course.
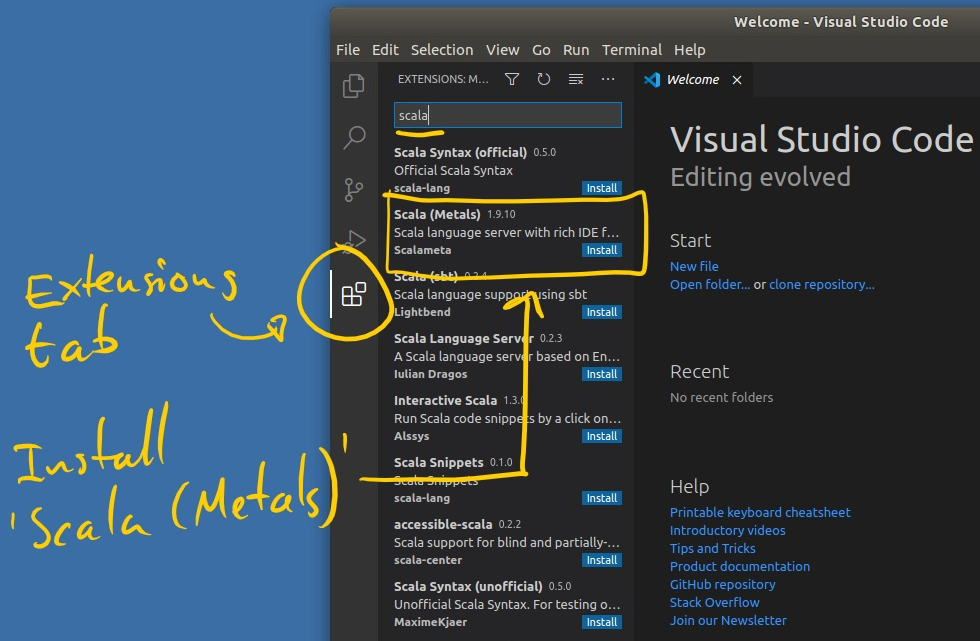
Run the VS Code application, select the extensions tab on the left-hand side, or in the menu View → Extensions
In the search field, search for “scala”, choose Scala (Metals), and hit install. This will install the Metals language server which adds IDE-like features such as code actions, completion, and syntax and error highlighting, among other things that make the development process concise and convenient.
Scala (Metals) is incompatible with the VS Code extensions Scala (sbt) and Scala Language Server. Under Windows 10 it may also conflict with the WSL extension. If you have used VS Code previously and have any of these extensions installed, make sure to uninstall or disable them for the assignment workspaces.
Download an exercise sbt source package from A+ and extract an assignment directory
Warning
If you are using VS Code on an Aalto Workstation do not place the assignment projects under any of the “standard” folders Desktop, Downloads, or Documents (or any other linked folder). Due to an open issue, compilation errors are not handled correctly. Instead, place them under some sub-directory you have created in your home directory.
Warning
Placing exercise folder in cloud storage (such as iCloud or OneDrive) can sometimes cause problems due to synchronization conflicts.
Navigate to the menu bar, proceed with File → Open Folder…, and select the extracted sbt assignment folder
Open the assignment folder containing the project and src folders (and the file build.sbt, if you can see it).
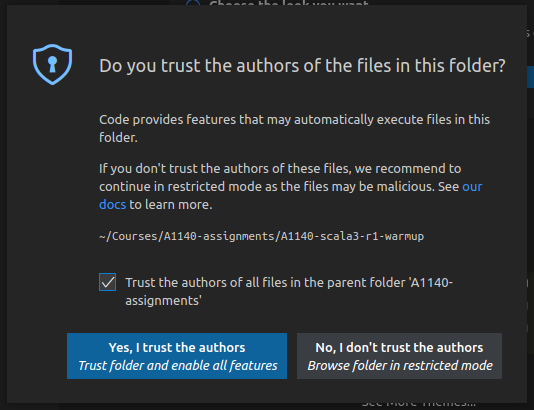
Recent versions of VS Code will show a dialogue asking if you trust the project. You should select Yes, I trust the authors to be able to build and debug the exercise. (If you pick the No option by mistake you can change it later.) If you organise a separate course folder (as you should!) for A1140, tick the box Trust the authors of all files in the parent folder… to prevent this popup every time you import a new exercise.
If asked, you need to select Yes to trust the exercise and activate the build tools.
If this is the first time you open a Scala project VS Code may download and install Metal extension components at this point. This may take a minute or two.
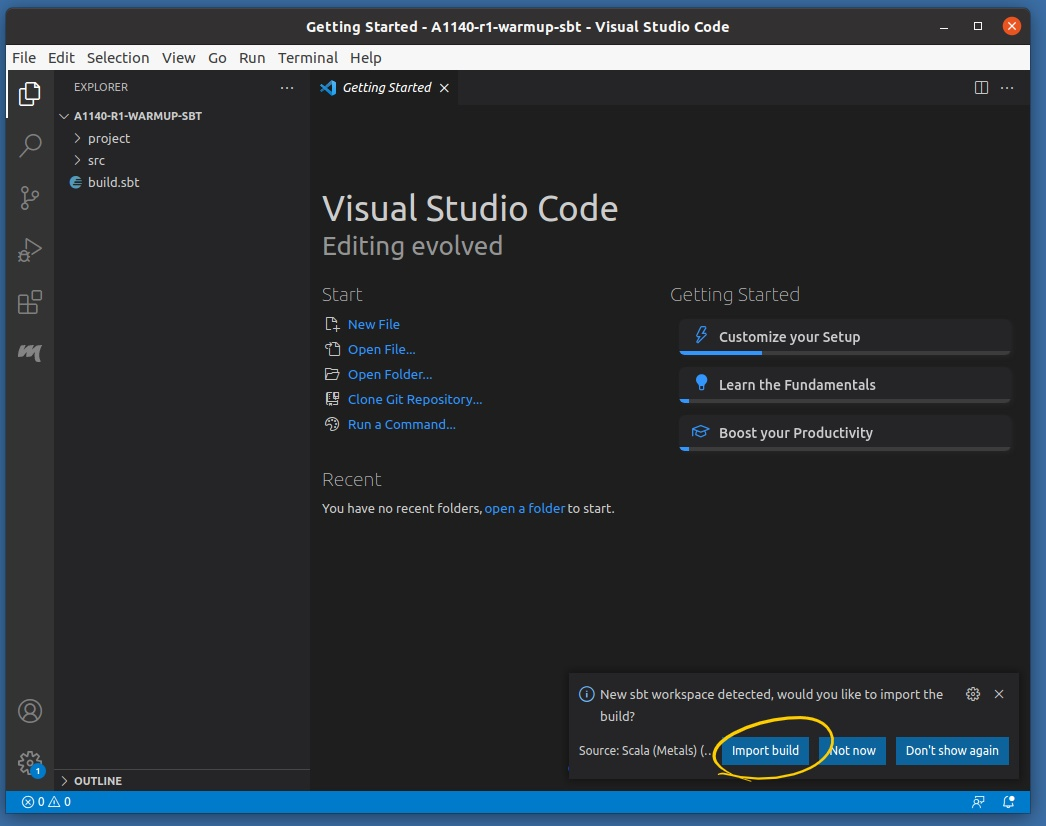
Next, VS Code will detect the assignment workspace and ask what you want to do with it. Choose Import build, and wait while the assignment is set up; progress is displayed in the blue status bar located at the bottom of the window. (If the pop up disappears, do not worry, you can get it back by clicking on the little ‘bell’ icon furthest to the right in the same blue status bar.)
If you do not get prompted to Import the project, make sure you have opened the correct folder or VS Code will not import it as a Scala project. (It needs to be the assignment folder containing the build.sbt file, and the project and src directories.) If this has happened, just close the current folder from the File menu and open the right one.
Read the provided program code and documentation
Develop your solution. The places you should insert your code are usually marked with ???
Some syntax errors will be shown as you type, and the build server will compile your code every time it is saved, so save often
Compilation errors are indicated in the status bar, in the program code, and the explorer. The full error messages are displayed in the problems tab: View → Problems
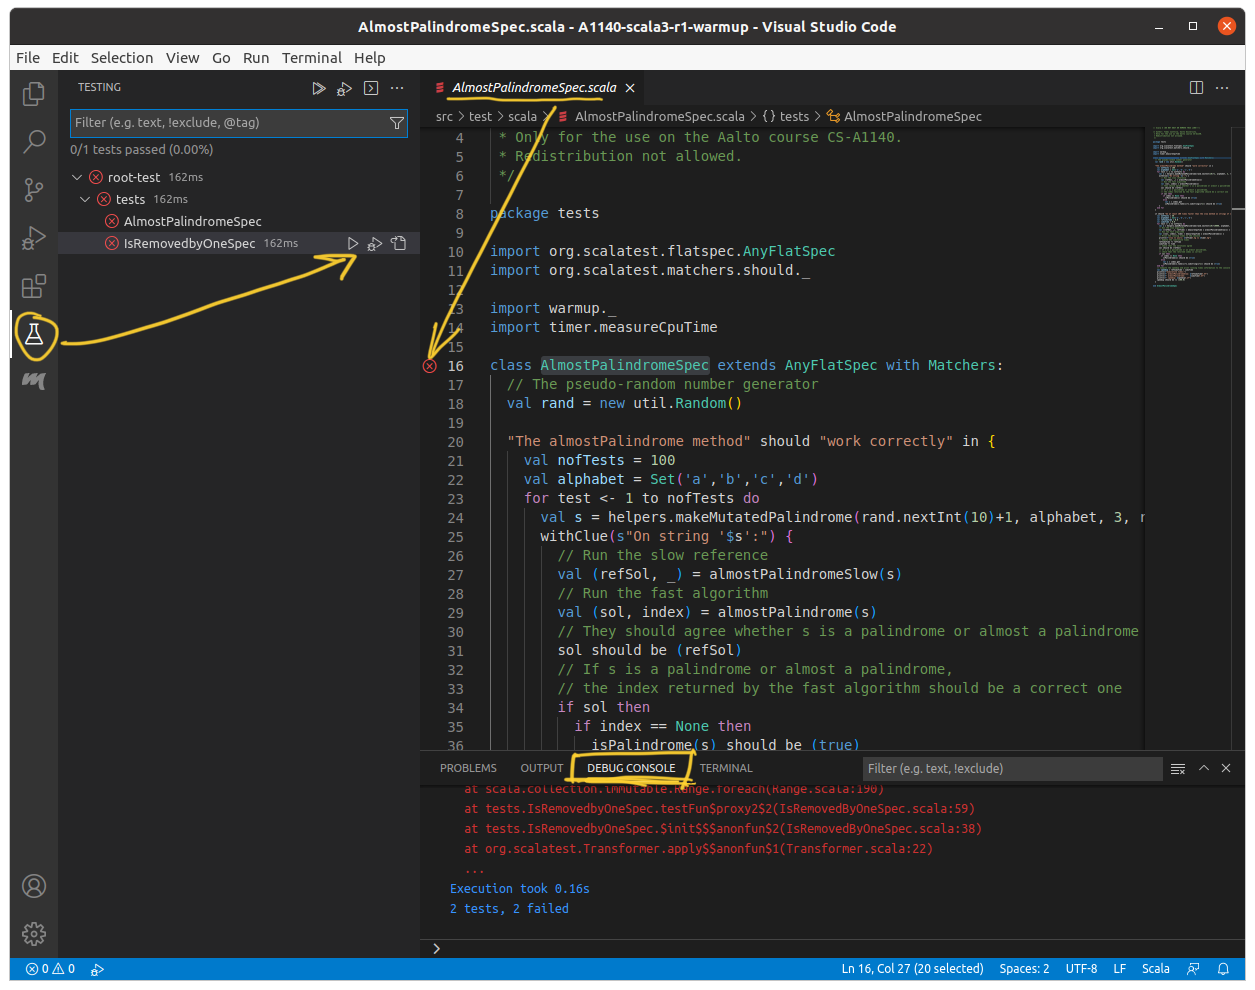
Run tests or programs by opening the corresponding .scala file in the test folder and click on the green ⯈ icon next to the corresponding test or main class. (Failed tests will show as a red ⛒, click on it to re-run the test.) Output will appear in the Debug Console (should appear automatically, otherwise go to View → Debug Console). Tests can also be run and overviewed from the Testing tab.
Note: Test/Run links will only appear if your program compiles, so make sure that your code is error-free and saved before testing it. Older versions of Metals will show links named ‘Run’ or ‘Test’ instead of the icons.
Always run the provided unit tests and check if they pass
Running unit tests from either the Test tab, or the test source directly. Results are shown in the Debug Console.
When you are happy with your solution, submit the required .scala files to A+ for grading (you can drag-n-drop the files from your system’s file manager/explorer in modern browsers; you can also open a system file manager from Code by right-clicking on a file tab and selecting Open containing folder).
While developing your solution it is sometimes handy to be able to test things in the interactive sbt Scala REPL. To start using it do the following:
Go to View → Terminal. This will open up a system terminal in your project. Here you can give system commands just as from a normal terminal window.
Note
Use the main menu to start the terminal. Do not use the popup menu from one of the project files, this will start a terminal in the specific sub directory of that file, and the sbt console may not work properly.
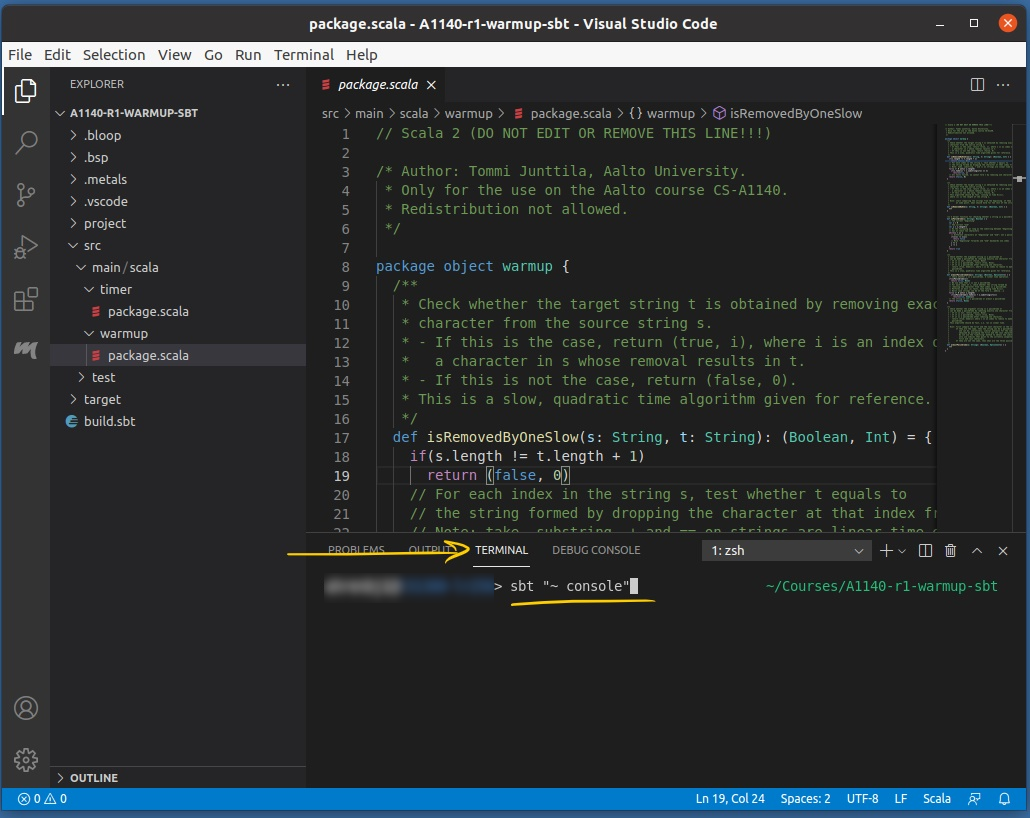
Give the command sbt"~console". This will start a Scala console using the sbt build tool, and additionally tell sbt to watch the assignment files for changes. Note that this uses a separate build mechanism from Code, so the first time you run it you may have to wait a few seconds for the files to compile.
Give the command sbt"~console" in a Code terminal tab.
Note
If the standard short-cuts pasting clipboard text is not working in the VS Code terminal try using Shift+Insert.
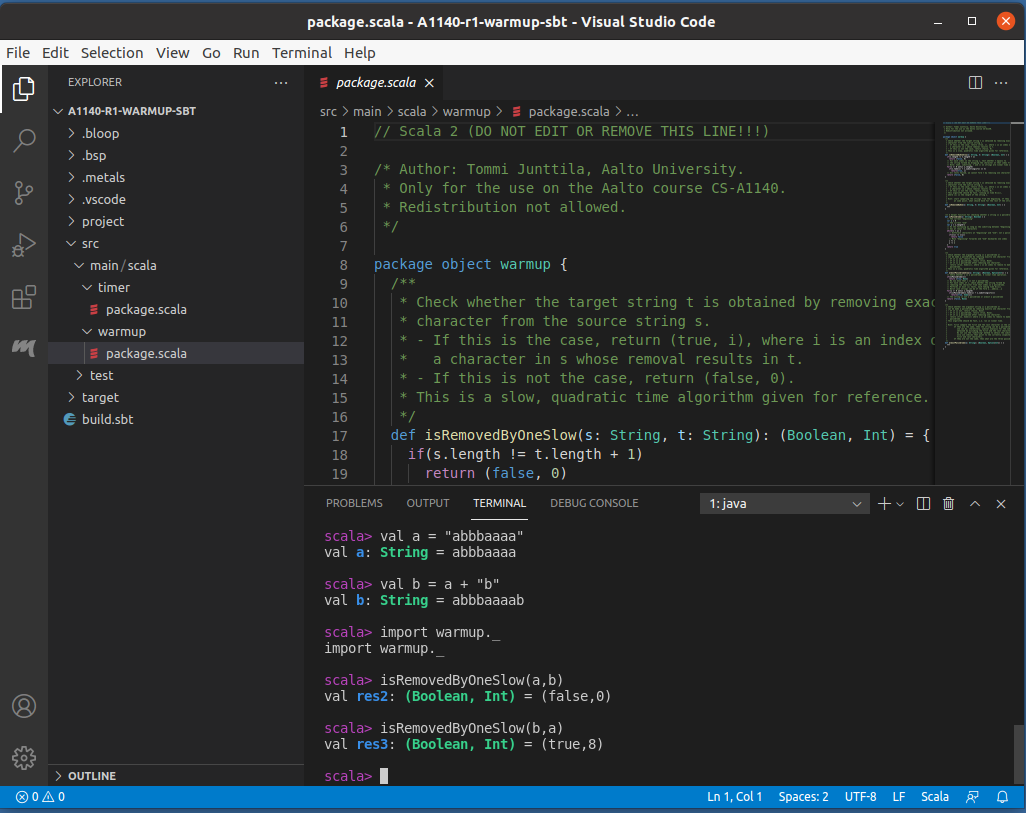
You should now see the familiar scala> prompt. Now you have a REPL ready to use, why not test it with some basic Scala? You can also import code from any packages in the current assignment, if needed.
If you happen to only give the command sbt by mistake, you will enter the sbt build system (the prompt starts with sbt). That’s not a problem, just enter the command ~console to start the Scala console from there instead.
The console will not start if you have a compilation error in your code.
If the terminal gives an error such as command not found: sbt then you need to check that sbt is properly installed and available in your system path.
Use Ctrl+d to quit the console, or recompile (if there are saved changes to your source files this will trigger a recompile, otherwise it will quit the console).
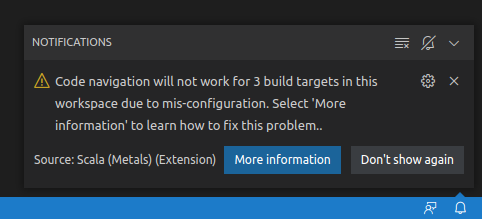
Unless you have manually edited build.sbt in an exercise project, this is likely due to Metals not registering all Java/Scala jar sources. Code navigation, debugging, and building of the exercise will still work. You may click away these warnings.
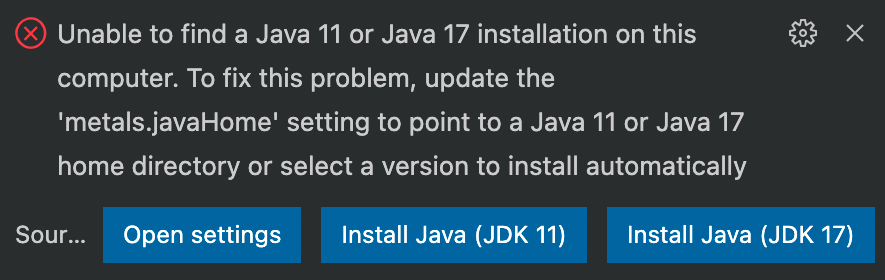
When VS Code is starting up Metals, it stops with the error Unable to find a Java 11 or Java 17 installation:
If you get this message, start by checking that you do not have an old version of VS Code.
One possible source for this error is that you have an older version of VS Code installed, while the Metals plugin extension is updated to the newest version. (Perhaps you installed it for another course or project, and turned off automatic updates.)
To make sure you have an up-to-date version of Code, select Check for updates in Code under the Help or Code menus (depending on your OS). Once Code has been updated, restart it. (If you for some reason do not want to update VS Code, you need to roll back Metals to an older version, e.g. to 1.11.1.)
If the error occurs despite you having an up-to-date version of Code, then it might be that Metals cannot find JDK 11 on your computer. The correct JDK location should be auto-detected, but if there are e.g. multiple Java versions on your computer detection can fail. To address this problem, you can explicitly set the Java Home path in the Settings. First, make sure that you have JDK 11 installed, then find the path to the installation directory (varies by OS). Copy this path and paste it in the field for the setting Metals: Java Home. You can open the settings by clicking the small cogwheel on Metals in the extension tab and selecting Extension Settings, as in the following figure:
Finding the settings for Java Home. Note that setting this path is only necessary if updating VS Code does not help.
The Test and Run links don’t appear in my source code
First, check that your code is error free and that you have saved it. The links only appear for programs on successful compilation.
Were you asked to import the project when you opened it?
If not, then you may have opened the wrong folder. The most common ‘wrong’ folder is a folder containing the assignment folder (on Windows machines, this can easily happen if the unzip creates a new directory to place the contents in and you choose the outer folder). The result is that the assignment is not recognized as a Scala project. The fix is easy: close the current folder File → Close Folder and open the right one (the one extracted from the zip file containing the src and project directories, and build.sbt).
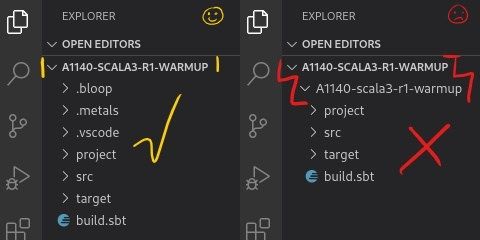
The assignment folder (containing src, project, build.sbt) must be the top folder you open for the project to be recognized (left). If you open a containing folder (even if it has the same name) it will not be recognized (right). If you are not asked to import the project you have the wrong folder.
You were asked to import, but choose not to, or clicked away the pop-up: click on the ‘bell’ icon to bring back the pop-up, or trigger a new import from the BUILD COMMANDS tab (see below), or by closing the folder and opening it again as described above.
If none of the above, the build server may have crashed. It is uncommon, but can happen.
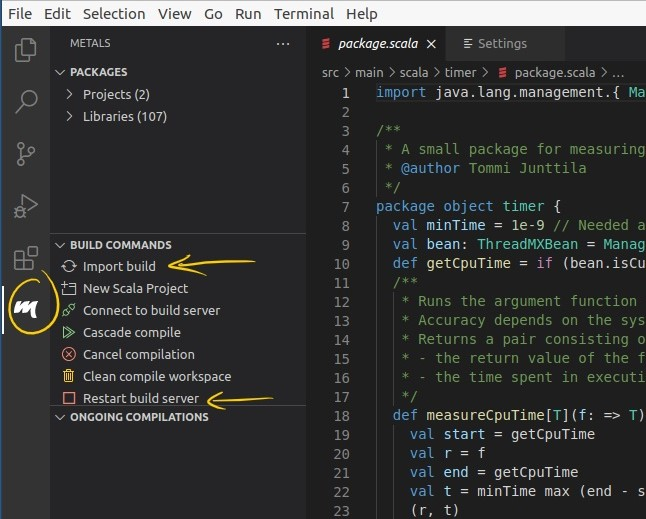
Go to the Metals tab (the m icon in the vertical tool-bar). Under BUILD COMMANDS click on Restart build server. It will take a few seconds for the build server to come up again, you can see the status in the message-bar.
You can then trigger Metals to re-scan the file for compilation by making a small change (e.g. inserting an empty line) and saving the file.
If the above did not work you can also force a re-import of the project by clicking on Import Build in the same menu.
Finally, if the links has stopped working suddenly, it could be that the old build process has crashed. In that case, try to terminate it as described in the next section.
Can happen if the wrong, or multiple versions of Java is installed
Make sure JDK 11 was properly installed
In the extensions tab select the cogwheel for Scala (Metals) and open the settings. Find the Metals: Java Home field and fill in the path to the JDK 11 (in windows use explorer, then right-click in the address-bar and select copy-as-text, then paste this value into the field).
Conflicting extensions
If you have either of the VS Code extensions Scala (sbt) or Scala Language Server, uninstall or disable that extension.
A defunct build server process is left on your system
This could be the case if the build process works initially, but then crashes. In this case it is worth trying to terminate the process and restart VS Code:
Shut down Code, then
(MacOS/Ubuntu) open a terminal and run pkilljava to terminate all java processes
(Windows) open the task manager and terminate any java processes
Restart Code. This should create a new build-server process.
(Windows, if you have a user name containing ‘special’ characters [such as ä and ö])
Sadly, paths are still not always handled properly, and some with non-ASCII characters in their usernames have reported problems under Windows. You can try to circumvent the problem by moving the project to a directory path not including your user-name. However, the more reliable fix seems to be to create a new user to specifically for course-work (using only ASCII characters); then, completely log out of your ‘real’ account (do not simply switch accounts) and use the new one while working on the assignments.
(Windows) Disable WSL for project
If you have previously used Code for other courses or projects, you may have the WSL (Windows Subsystem for Linux) extension installed. This extension can interfere with Scala (Metals). The solution is to disable the WSL extension for your Scala projects (Extensions, WSL, click the drop-down menu at Disable and select Disable (Workspace), then restart Code.)