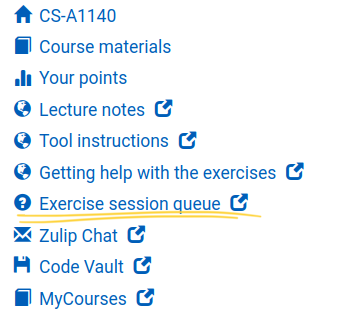
Getting help with the exercises
On this pages you will find basic information on how to get help with the programming assignments and course material.
Exercise sessions
The best way to get help is to come to one of the several weekly on-campus exercise sessions, where Teaching Assistants (TAs) will be on hand to help you. Please see the MyCourses pages of the course for the schedule.
The exercise sessions will take place in the Aalto computer labs with ca 30 Linux Workstations. During the exercise hours these labs are reserved for CS-A1140 and you are welcome to come there to work on your programming assignments.
While space is limited in the labs there are several sessions throughout the week, and you should be able to find one that suits you.
Queuing for help
To make sure everyone get help in turn during an exercise session we use the, which you will find a link to from the A+ menu. (Note that you have to be signed in to A+ and a student on the course to join the queue.)
Click on Exercise session queue to open the queue web page.
The queue opens when a new exercise session starts (or a few minutes early). Pick the current exercise session and click ‘Join Queue’. The teaching assistants will come to help you.
If there is another exercise session scheduled after the current one in the same classroom, the queue is usually transferred automatically.
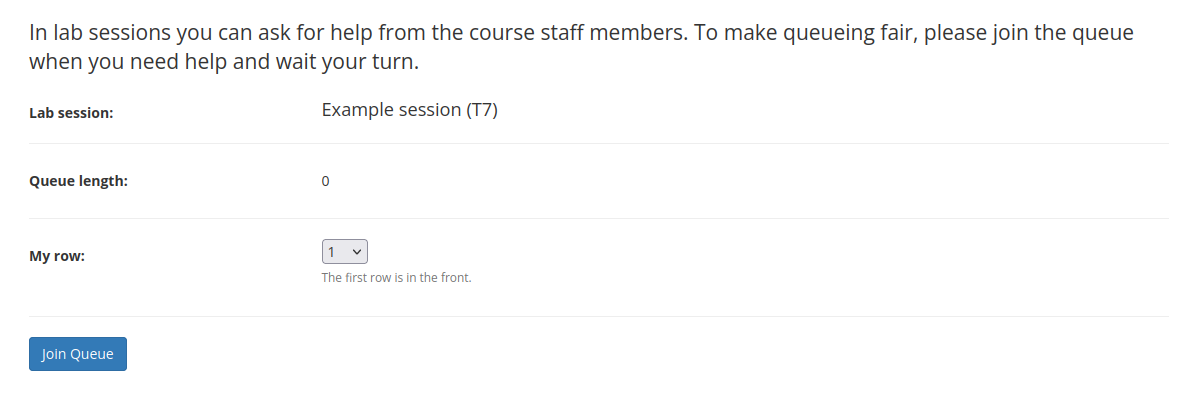
After picking the session click ‘Join Queue’.
Zulip
If you like, you can also ask for help in our Zulip Workspace. The link for the workspace will be given below, please read the following two paragraphs first.
The Zulip workspace is hosted by Aalto School of Science. To join, click on Aalto Login which will have you sign up using multi-factor authentication.
Use of your real name is encouraged so that is easier for the teaching assistants to help you. However, if you prefer to be anonymous towards other students, you can set your “name” and “display name” to your initials. The teacher(s) of the course can always see your real identity.
The Zulip workspace of the course is https://cs-a1140-2022.zulip.aalto.fi .
The workspace has the following streams:
Round xyfor asking questions about the material and exercises in the roundxy. Please see the Etiquette below. As the limited working hours of the assistants are prioritized to the Exercise sessions, the help requests in these channels are only answered if time permits, no guarantees are given.generalfor any other questions about the course, or on data structures and algorithms.
Note
Please note that Zulip push notifications are blocked on iOS and Android due to Aalto IT security policy.
Etiquette
Be polite towards others.
Do not send help requests in private messages to the course personnel, they will be ignored. Helping is done only in the online exercise sessions and in the
Round xychannels.If you want to ask a question about your code in a
Round xychannel, pleasepost your code in the “Code vault” service found in the A+ page of the course, and
then post the provided link in Zulip. Only the course personnel can access your code in the “Code vault”.
Do not post your exercise solution code in Zulip: the goal of the course is not to learn modifying other’s code to look like self-written, but to work through the whole problem by yourself.
When asking for help with your code, please
be prepared to explain how the code is supposed to work if you ask for help in an online exercise session, or
comment your code before submitting it to the “Code vault” if you ask for help in a
Round xychannel.
This not only makes helping easier, but it may be the case that one spots problems in the code when thinking how to explain/comment it. And by explaining and commenting, we do not mean statements such as “assign x to y” but higher-level comments such as “Link the child node to the parent node. After this, the tree data structure is well-formed.”.
Online exercise sessions using Zoom
We recommed the in-person on-campus exercise sessions for getting help with your exercises. However, we also provide a couple of online sessions every week in case you cannot come to campus due to e.g. helth reasons.
These are like normal exercise sessions at the computer classes, but organized fully online. We use the same exercise queue to keep track of whose turn it is. When you get in the queue make sure to include the link to your Zoom session. When it is your turn a TA will connect with you.
Tip
The remote queue will auto fill the previous zoom link you provided so if you always use your personal meeting room (or some other ‘fixed’ zoom link) you do not need to paste it every time.
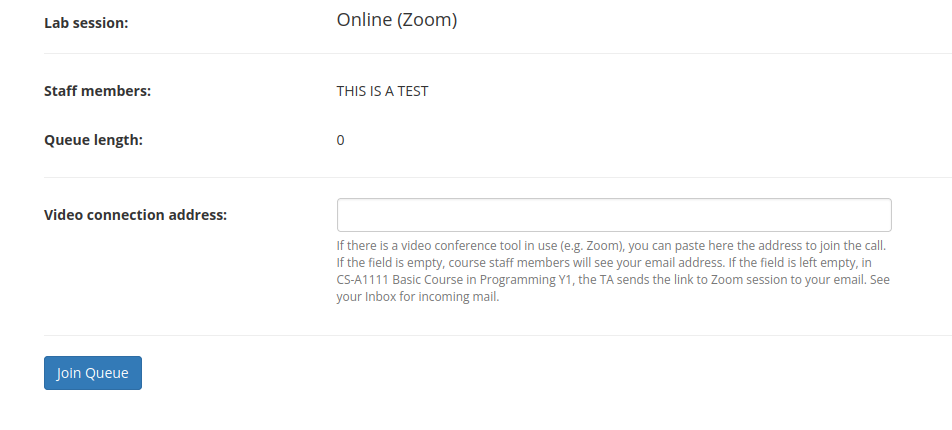
For remote exercises provide a link to a Zoom session in the Video connection address.
Warning
Do not leave the Zoom session field blank when you sign up to a remote exercise session. If you do, you will still be in the queue, but the TAs cannot connect to you. They may then have to move to the next one in line and ask you to join the queue again. If you happen to forget the link or enter the wrong one you can update it afterwards.
Make sure to also keep an eye on Zulip during the online exercise sessions. If course staff is unable to connect to your Zoom session they will try to send you a message there.
Setting up Zoom
Zoom is a service, supported by the Aalto University, that allows video calls with screen sharing.
First, one needs to install Zoom. There are two possibilities.
Install the Zoom desktop client. In this case, please consult the Aalto Zoom Quick Guide.
Use Zoom through a web browser. In this case, use Firefox or Chrome as Safari does not support screen sharing. Although Zoom can probably be trusted, it is always safer to log out of all the other web services before sharing the screen through a web browser, please see this Mozilla support post.
Second, go to https://aalto.zoom.us/, log in, and edit some settings.
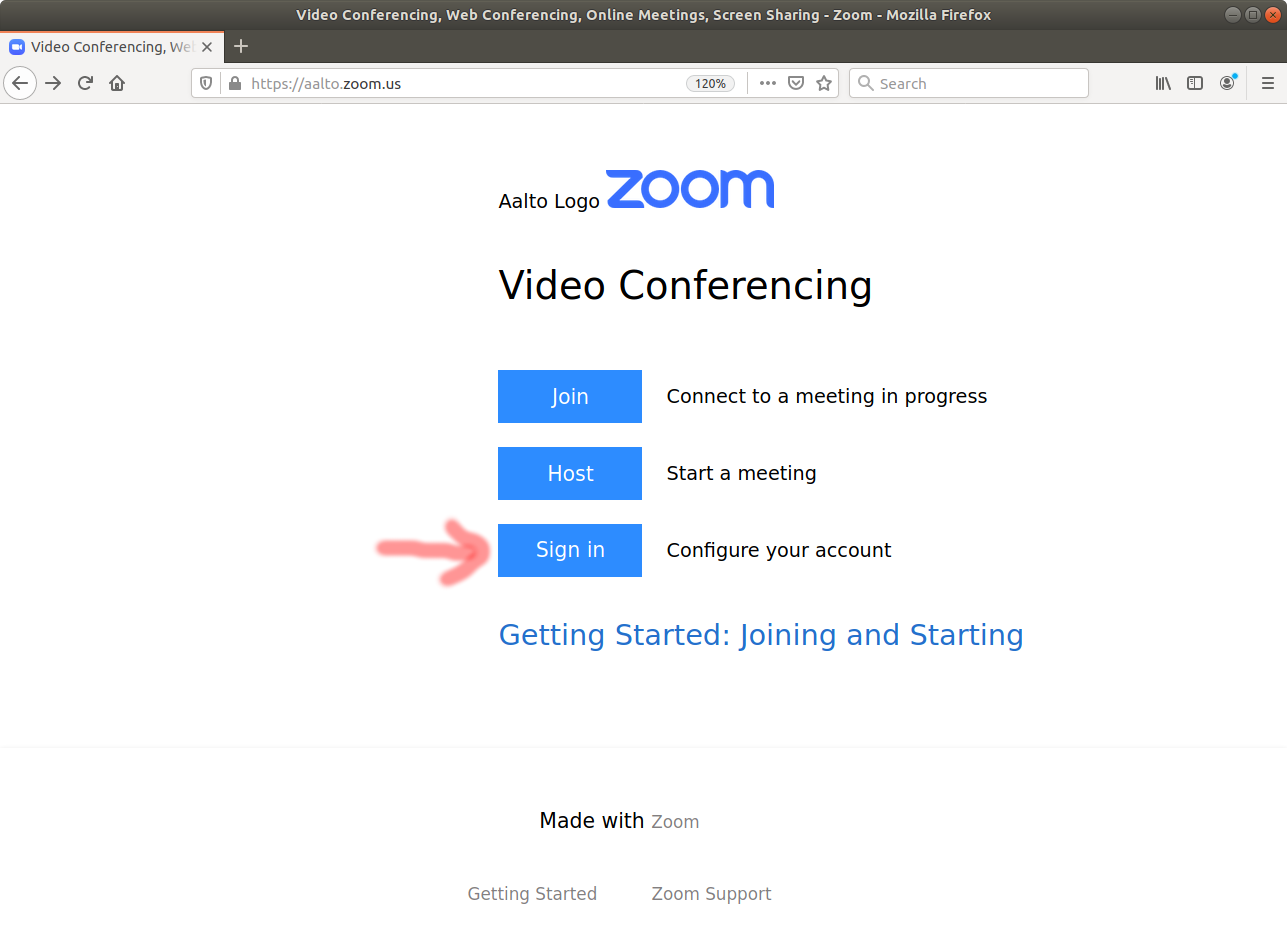
Figure: Select “Sign in”

Figure: sign in by using your Aalto email and password.
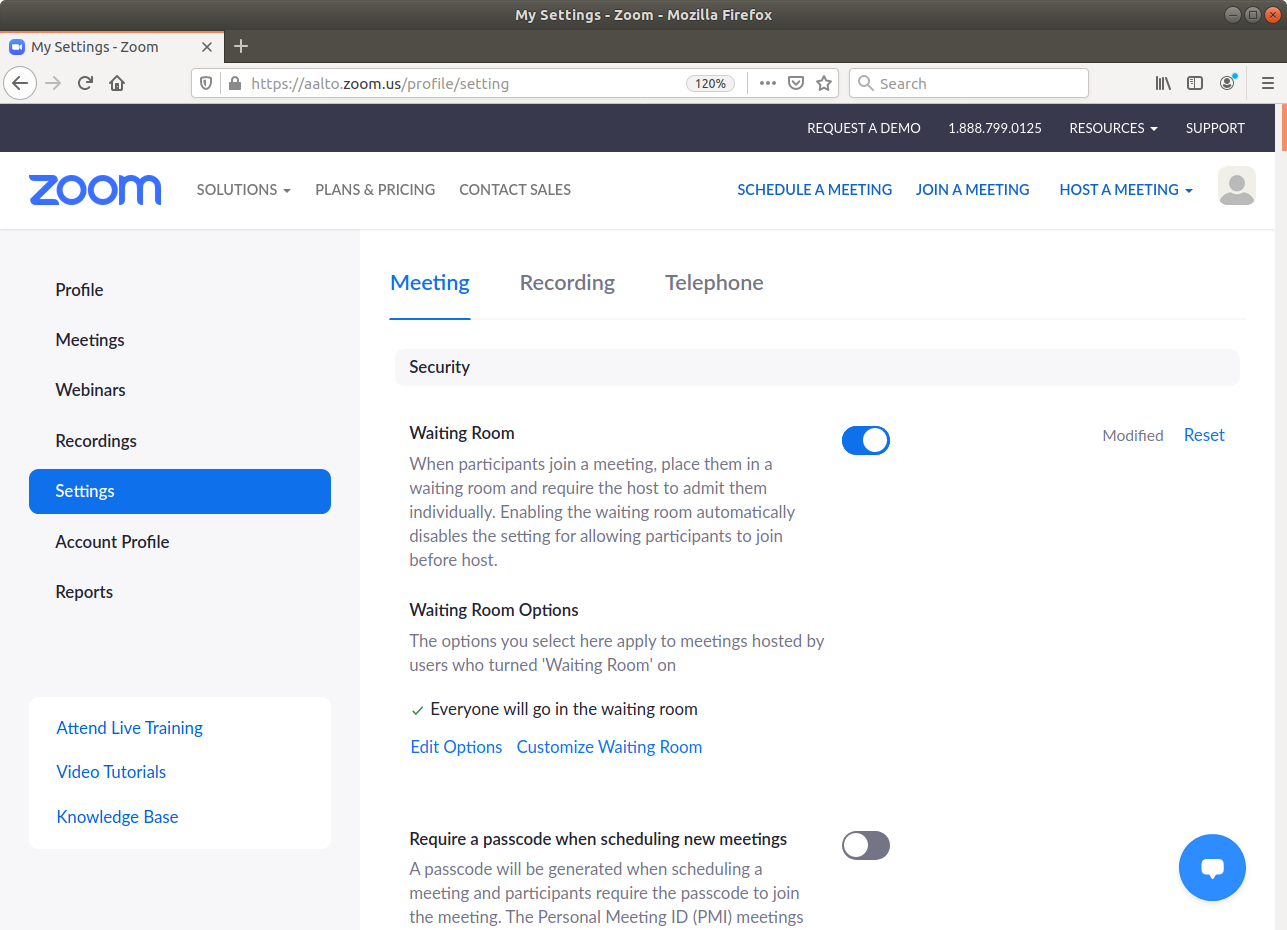
Figure: go to “Settings”. You can select “Waiting room” so that people cannot accidentally join in your meeting but they first go to a “Waiting room”: you can then admit the teaching assistant in the meeting.
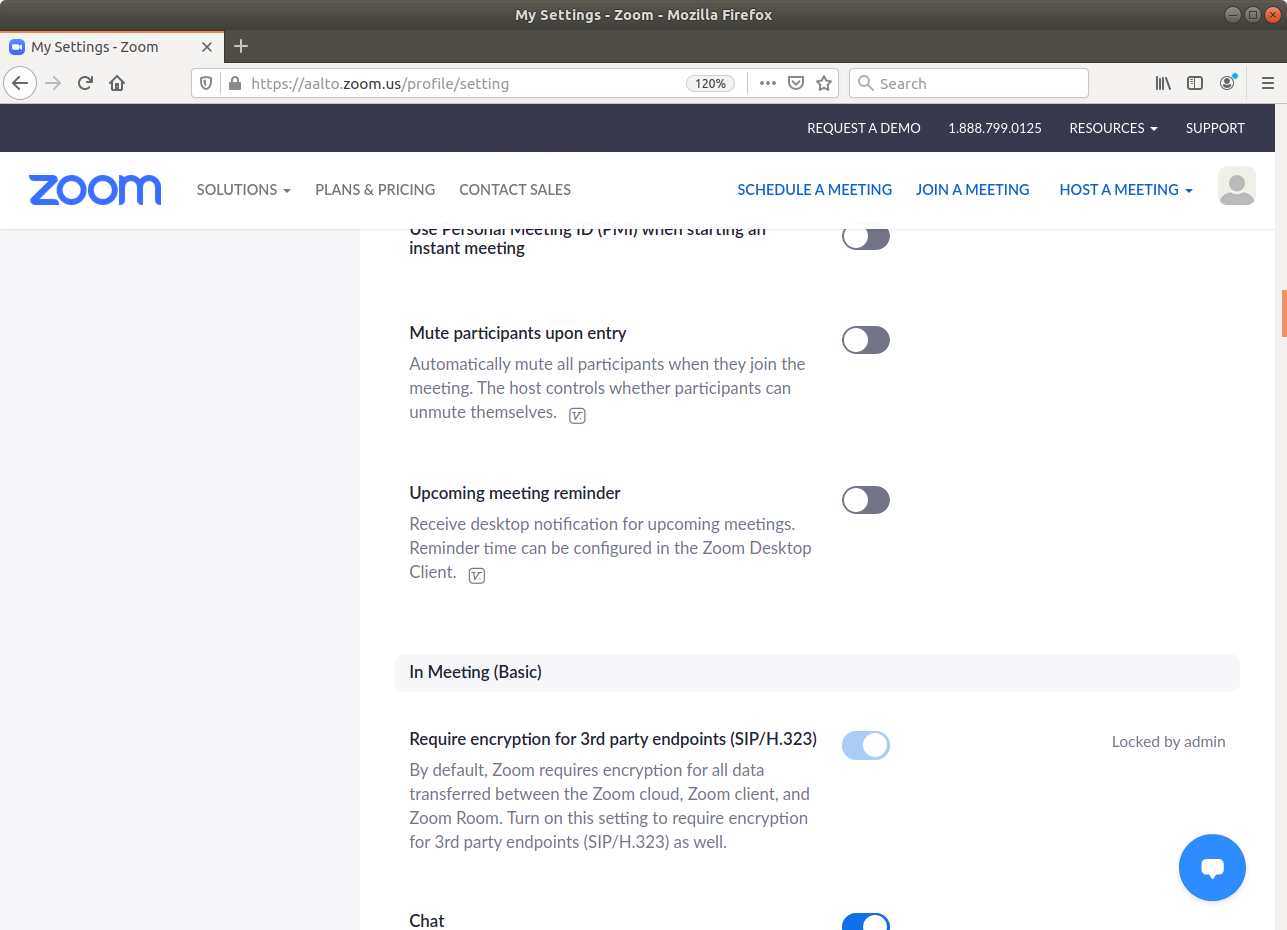
Figure: in the “Settings”, verify that “Mute participants upon entry” is not checked. In this way, you can hear the assistant immediately when she/he is admitted in your meeting.
Creating a Zoom meeting
To create a Zoom meeting, do the following.
Note: when making your first Zoom meeting, permissions to use microphone, video, and screen sharing will be asked. Furthermore, in some cases, the Zoom client may have to be restarted after granting screen sharing permissions. Thus you may want to practice making Zoom meetings with your friend first, and be patient when making your first Zoom meeting in an exercise session.
Start the Zoom desktop client, or go to https://aalto.zoom.us/ if you are using the web browser interface.
Select “New meeting” (desktop client) or “Host” (web browser).
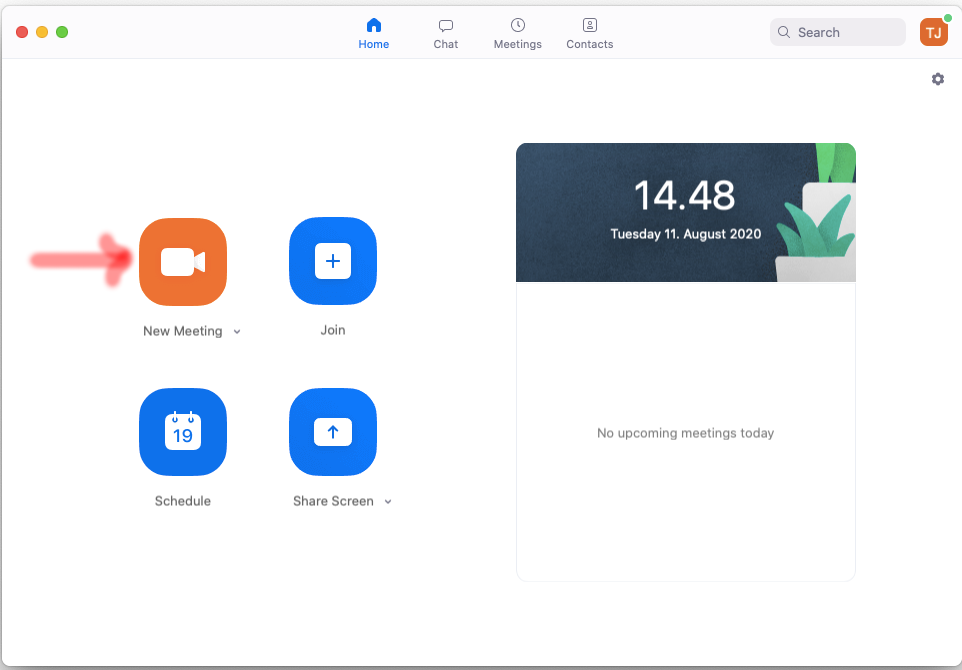
Figure: Start a new meeting in the desktop client.
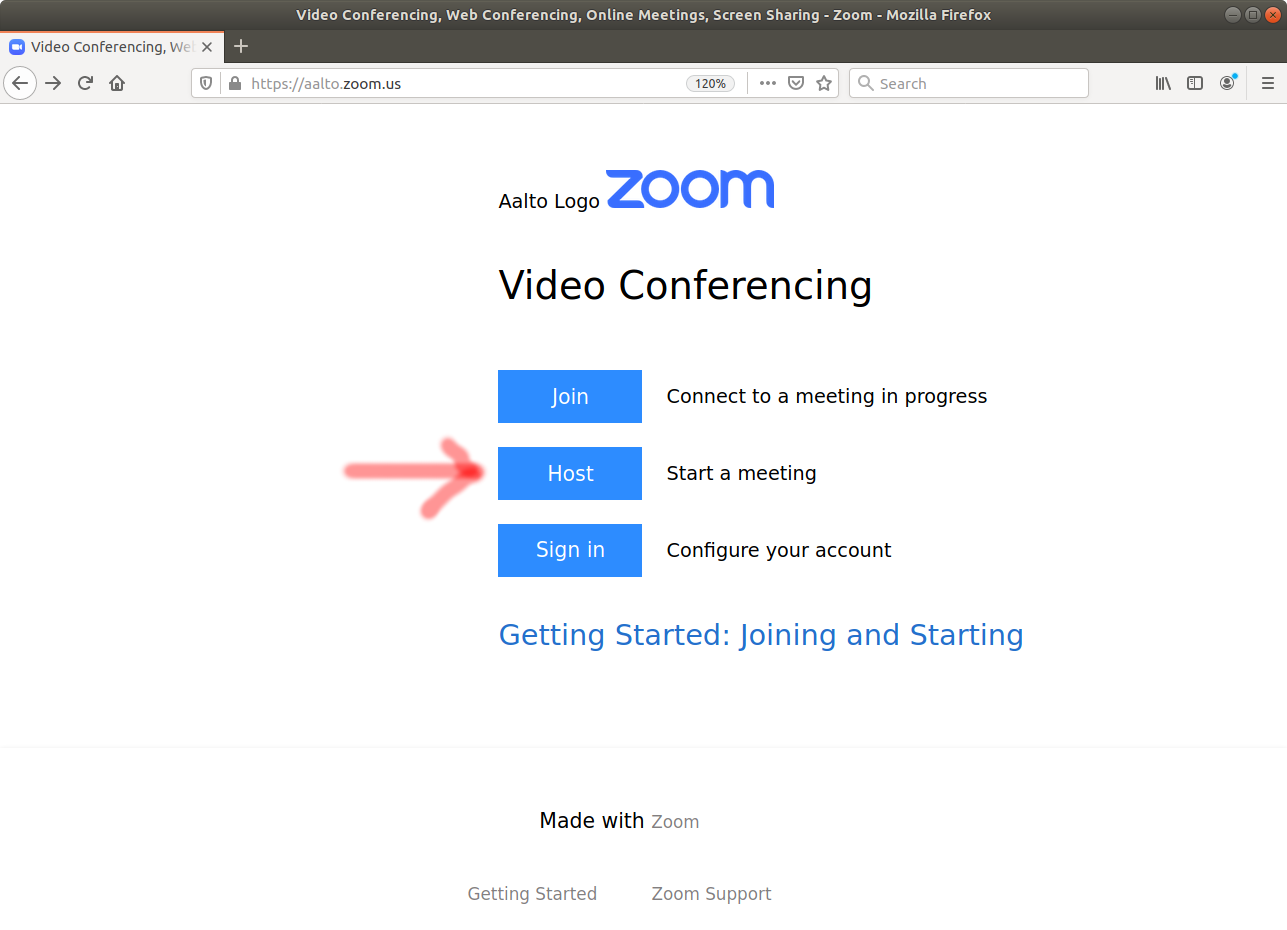
Figure: Start a new meeting in the web browser.
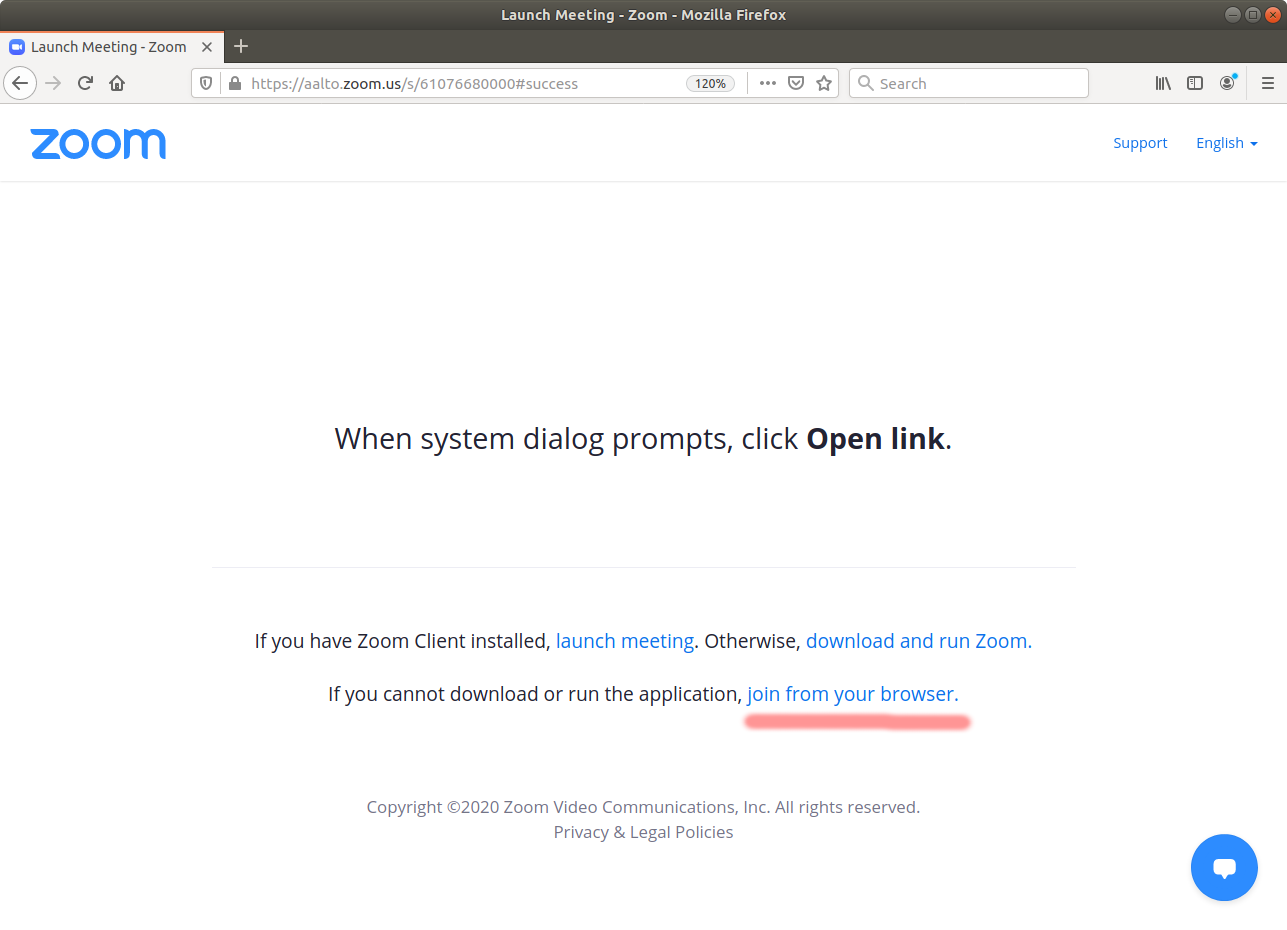
Figure: When using the browser version, select “join from you browser”.
Then, select “Join Audio by Computer”.
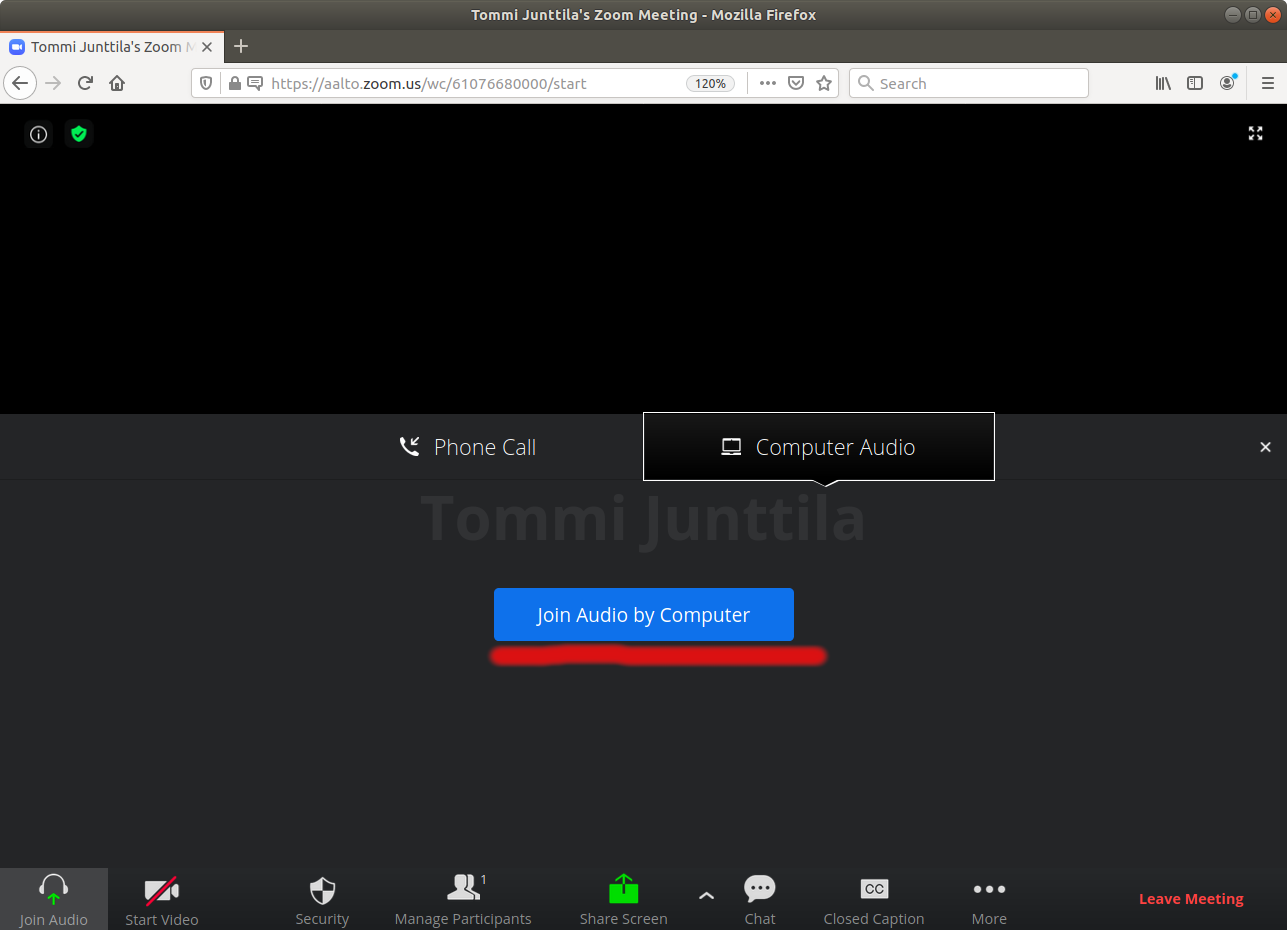
Figure: When using the browser version, select “join from you browser”.
You now have started a meeting. To invite an assistant to the meeting, click the small “(i)” info button in the upper left corner, copy the “Invite link”, and post it to the queue topic in Zulip.
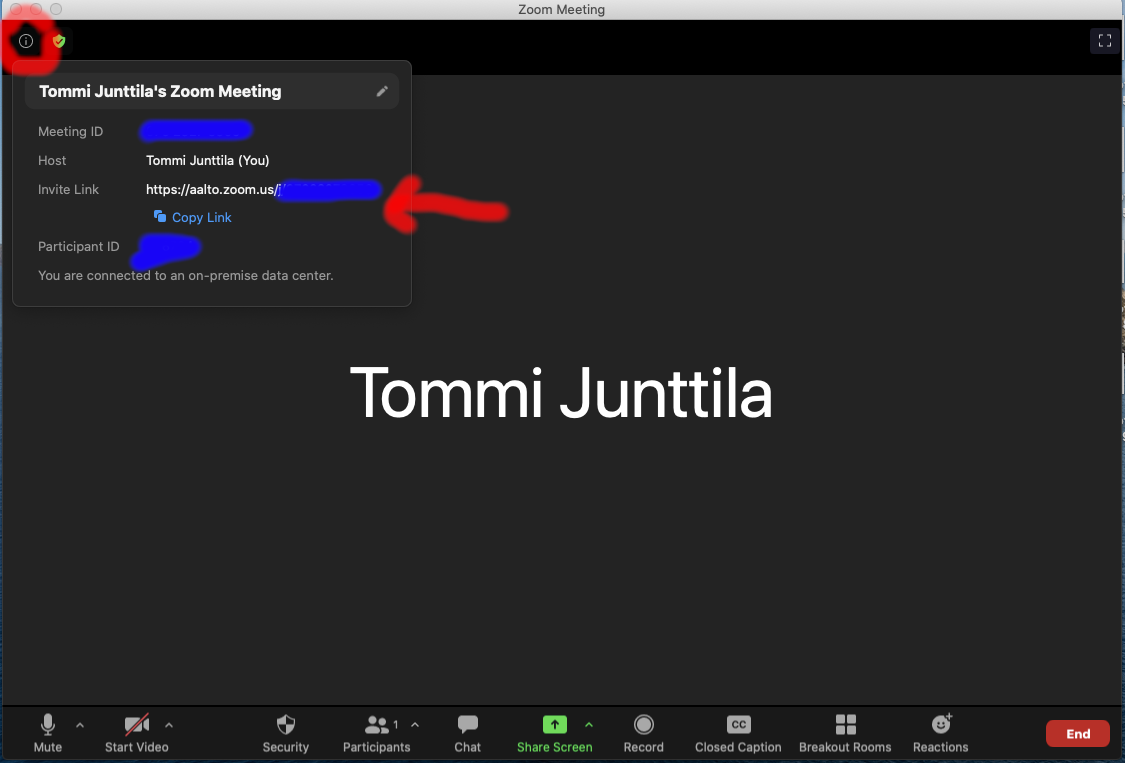
Figure: Get the invite link and post it to Zulip.
When an assistant joins the meeting, “Admit” her/him in the meeting. After this, you can discuss with him and share your screen with her/him.
While sharing your screen with the assistant, it is often handy to use annotations.
Annotating your shared screen should be enabled by default, but if it does not work, sign in to the zoom web portal at https://aalto.zoom.us, then go to Settings -> In Meeting (Basic) and check that Annotation is enabled and that the option Only the user who is sharing can annotate is unchecked.
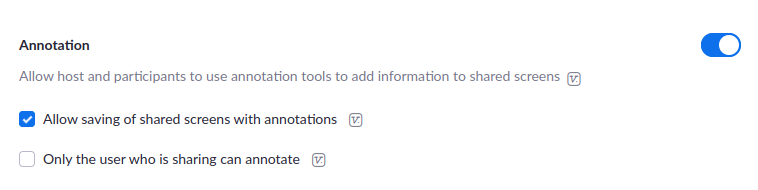
Figure: To use annotations while screen-sharing, make sure they are set to default.